Managing Employee Leaves
Planning and forecasting tasks and projects required the updated information for the resource availability. Leave management application helps to provide the updated information for employee unavailability. Leave management application in CPAbooks can be used independant or integrated with Project Forecasting application for the better planning of any long term project.
There are many business cases where tracking of employee leaves are necessary, let’s see how CPAbooks Leaves application will answer all those business cases.
Business case
The types of leave and number of leave available for each leave types are as below in our business case.
The leave cycle starts from January 2018
Working schedule for all the employees are morning 8 am to 5 pm with 1 hour of lunch break
Full time employees have 12 Legal leaves for the year 2018
Part time employees have 12 half leaves for the year 2018
All employees are eligible to get the 6 Sick Leaves during the year 2018, however employees can have more sick leaves if needed with medical certificates
Employee can have the Compensatory Days off in some cases where employee have worked on off days
Let’s configure all the above business cases in CPAbooks and get the updated leave information for all the employees.
Configuration
Install the Leaves application form Apps menu on your instance, only an Administrator user can perform installation operation.
Make sure that you have a updated leave policy ready, let’s take a business case and configure the number of leave available to each employees for each leave types.
Working schedule
As per business case the working schedule for all the employees are morning 8 am to 5 pm with 1 hour of lunch break. To configure the working schedule please goto Settings → Technical → Resources → Working Time, create a one if the default working schedule does not meet your requirement.
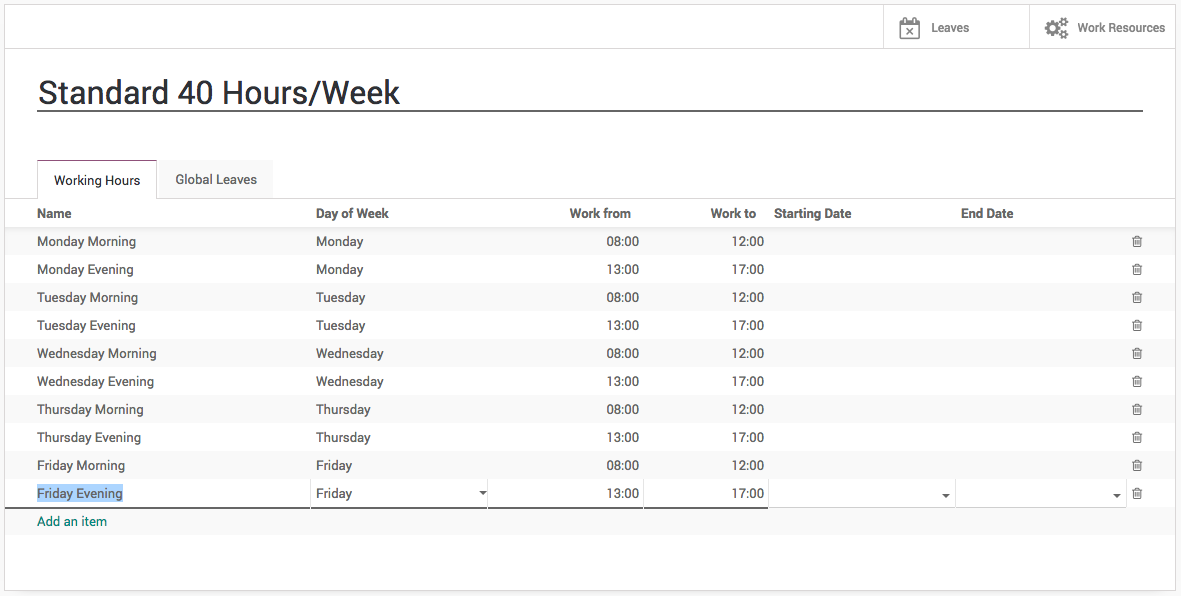
I have created the Standard 40 Hours/Week schedule, almost all the employees are working under this schedule. Leave the Starting Date and End Date empty if you would like to use this schedule throughout the year or until the changes required in working time.
Default Working Schedule
This can be set as a default working schedule for every new employee created in the system, goto Configurations → Settings under the Employees application.
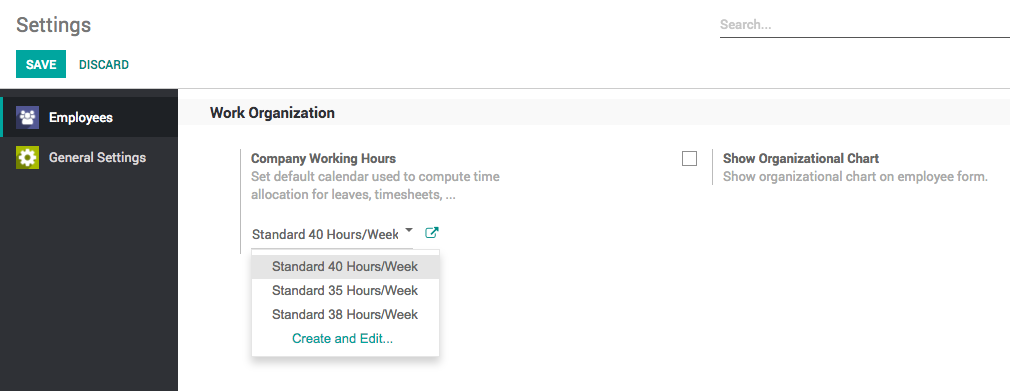
Warning: Changing the Company Working Hours will not change the working schedule for the existing employees, the new employees created after the change will have this working schedule as a default.
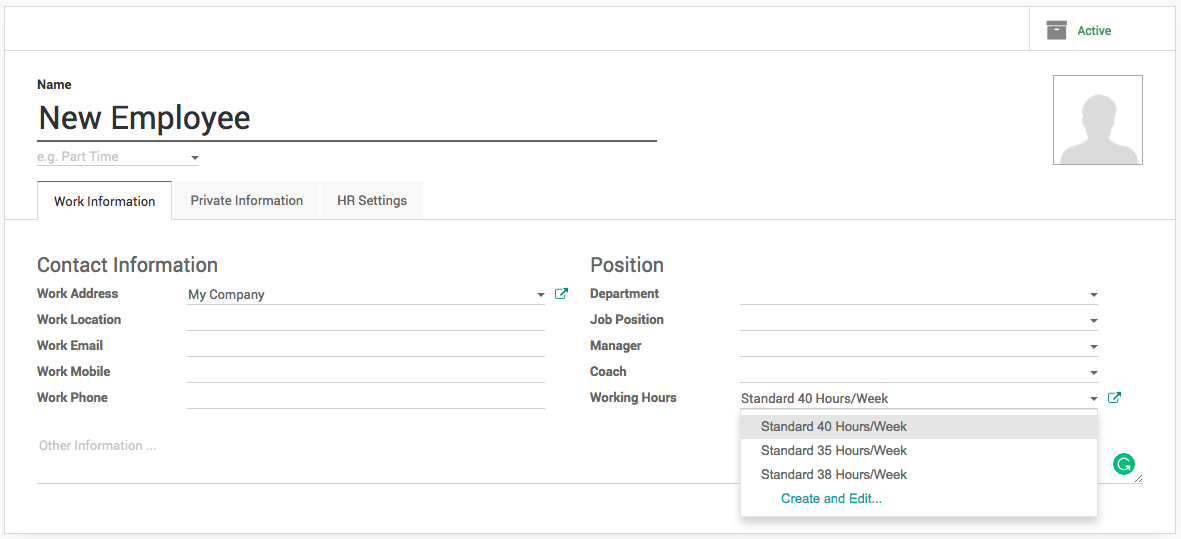
When you have a new employee joining in the company, the default company working hours will be applied to that employee, however it can be change if required for the specific employees at the time of creation or later.
Employees number of leaves also required to compute the salary statement for every month so that unpaid leaves can be deducted from the salary.
Tip: The working schedule can be change for specific employees directly on the employee configuration.
Employee Tags
Create an associate employee with tags are an important feature that allows us to automate allocation of leave quickly, the leave can be allocated either by Employee or by Tags, immagin when you have thousand of employees and you have to assign different types of leaves. When you work by Employee it increase a lots of work for the HR office or manager.
Create and assign the tags to the employee carefully, as based on the tags leaves will be allocated. In our business case we will create a Fulltime and Parttime two different tags to differentiate the employees at the time of leave allocation.
The simplest way to create the tags is directly from the employee form, just type the tag name and choose option to create that tag with Odoo’s quick create feature.
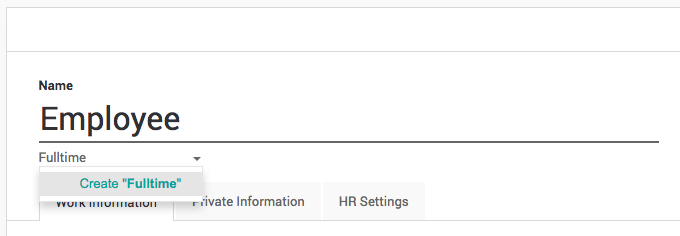
Click on Create “Fulltime” link to create and assign created tag to new employee being created.
Note: You can assign multiple tags to the employee that helps you to group the employees and search them quickly when needed.
You can verify the list of employees for the correct assignation of tags from the employee directory. Goto Employees and enter Fulltime and search for the Tags.

Make sure that you have verified the list of assigned employee on each tags, fix it before you proceed for the leave allocation.
Leave Types
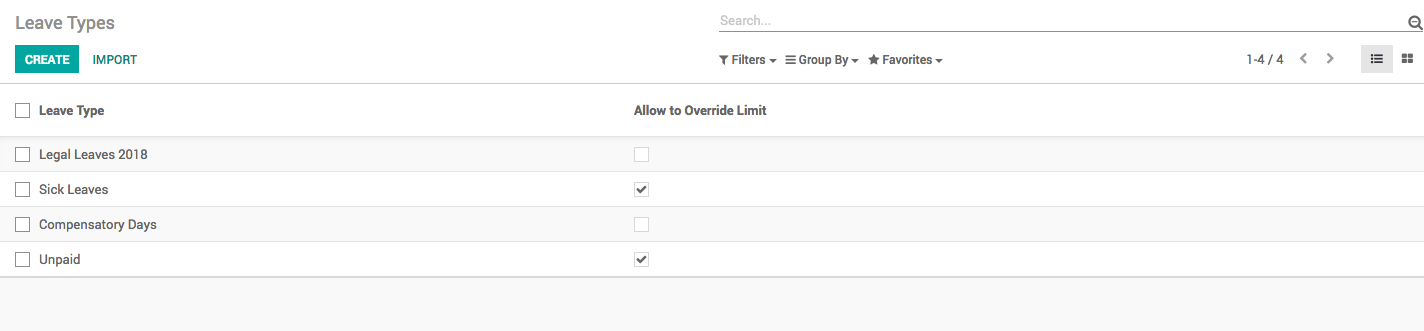
Default leave types are already given in the CPAbooks as a standard data, however you can create more if needed according to your business case.
The leave types can be access from Configuration menu under the Leaves application.
You can create a new type of change the existing according to the business rules you need. You can change the below fields to adapt your business rules on leave type.
Apply Double Validation: Check this field when you want that the approval of the leave will be done by Department Manager and HR Manager.
Allow to Override Limit: The number of leave are always predefined, however you can allow to request for more leave than the defined/allocated, i.e. sick leaves can be requested more than assigned.
Meeting Type: Once a leave is validated, CPAbooks will create a meeting of this type on the correspondent calendar.
Color in Report: This color will be used to To display the specific types of leave in with color in PDF report.
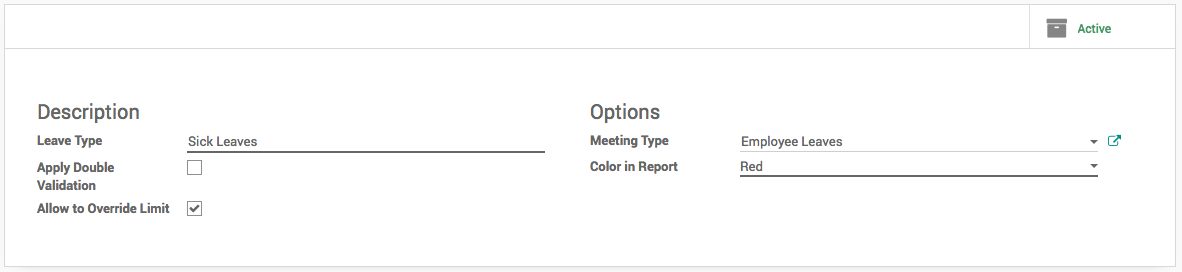
As a business case Sick Leaves may extend. So, check Allow to Override Limit field on the view.
Leave Allocation
Leaves can allocated by HR Manager or Officer or Department Manager at anytime to employees. The yearly leave allocation will be done by HR Officer or Manager in the beginning of every year while Department Manager can allocate the Compensatory leaves. Let’s create the yearly leave allocation.
To assign the leave goto My Leaves → Allocation Request under the Leaves application and click on CREATE button.
By default you can assign the leaves to selected employees, employees can also create the allocation request to ask for the compensatory leave, which will be reviewed and approved by Manager or HR Office later.
Leave by Employee Tags
It is advisable to allocate all the yearly leaves to the employees by their tags, it will save lots of time to create many records, each for an individual employee.
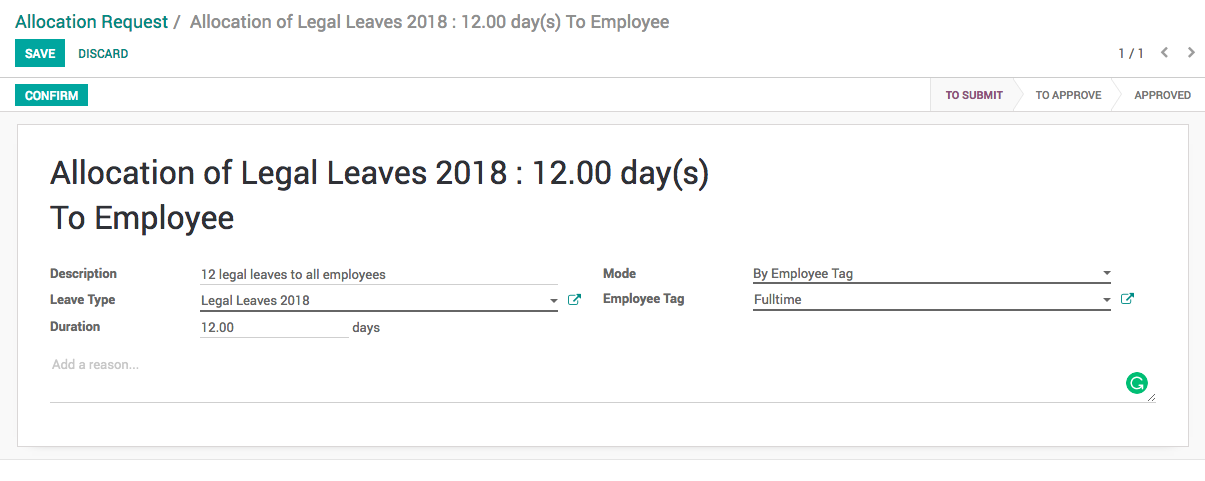
Select the Leave Type and enter the Duration (duration is always in days). Change the Mode from By Employees to By Employee Tags and select the specific tag in Employee Tag field, it is group of employees to whom we are going to assign the 12 legal leaves.
By default the leave allocation will be in draft, it has to be requested for the approval, click on CONFIRM button to ask for the approval, HR Manager have the rights to approve the allocation request.
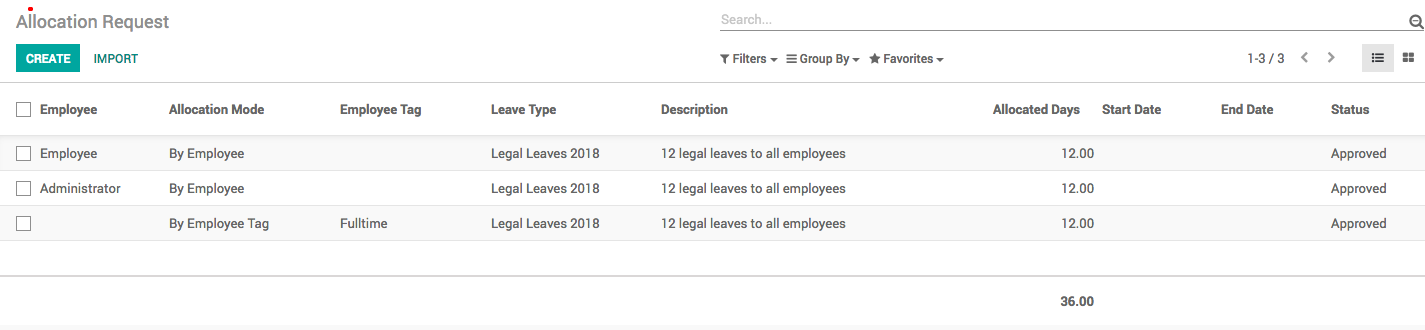
As soon as the allocation request approved, CPAbooks will create an individual leave allocation request for each employee who belongs to selected tag.
Compensatory Leaves
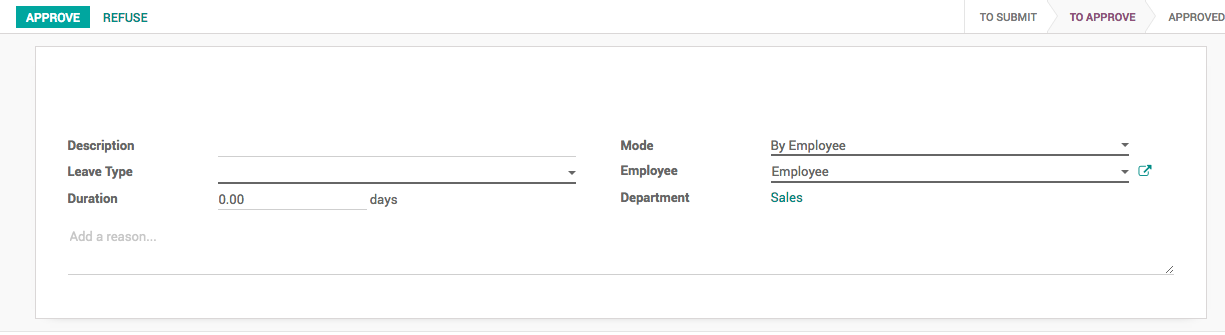
Employee can create a leave request manually, enter the appropriate Description, Duration and select the type Compensatory Days in the Leave Type field.
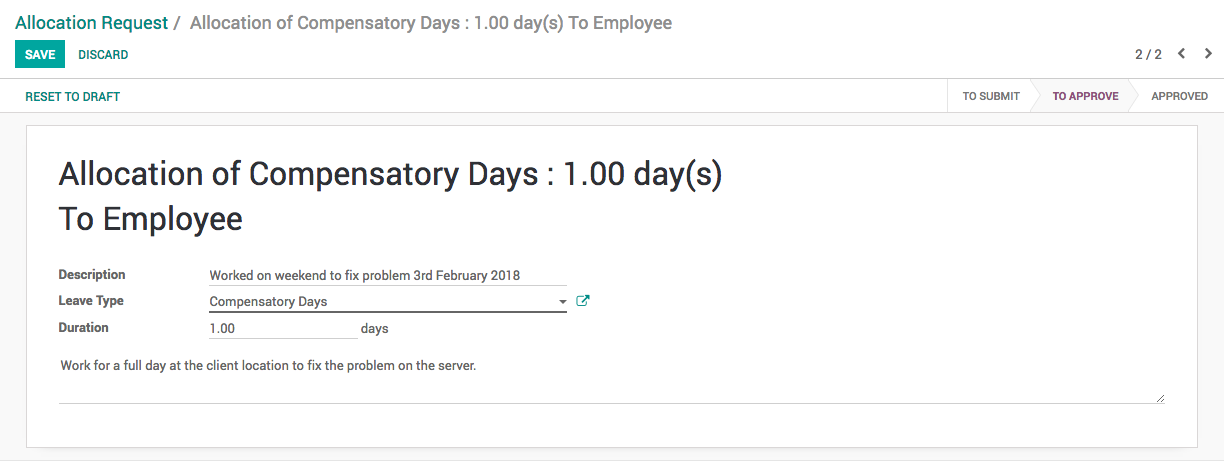
As an employee you have already applied, you have to wait for the approval for your department manager or hr manager.
Leave Summary
As soon as the yearly leave allocated, it is advisable for all the employees to check their leave summary for the allocated leaves. Leave summary for an individual employees can be checked from Leaves application, the first screen will be leave summary.
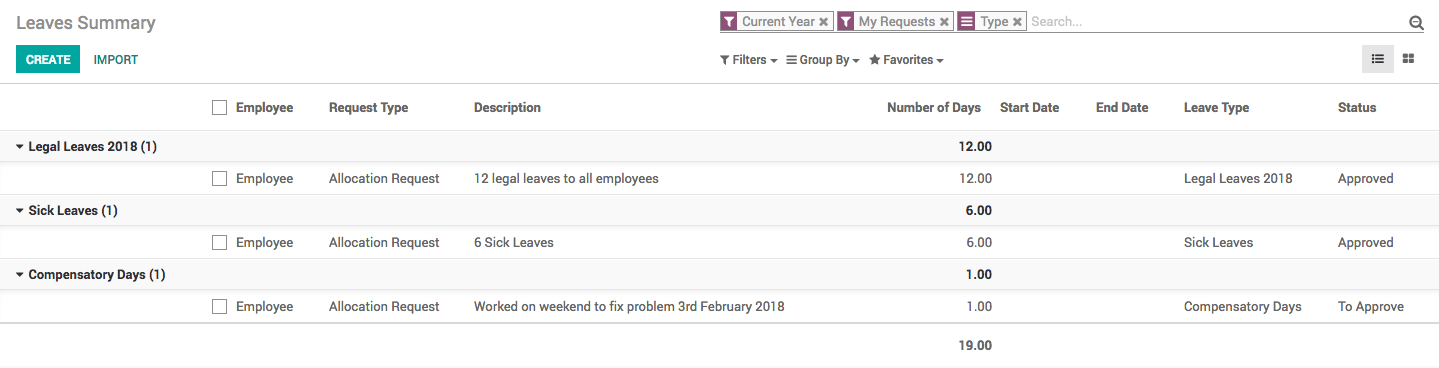
Employee can see their leaves it can be allocated or requested, whether their status approved or rejected. The actual leaves available to the employees will be displayed on the employees form.
